When search engines like Google or Bing crawl your WordPress site, they don’t just look at your content—they follow every file, folder, and link they can access. But what if you want to control which parts of your website are visible to them? That’s exactly where the robots.txt file comes in.
The robots.txt file acts like a traffic signal for search engine bots. It tells them which pages or directories they can crawl and which ones they should avoid. For example, you might want search engines to skip your admin area, private files, or duplicate content while focusing only on your main posts and pages.
For WordPress users, learning to edit robots.txt is an important step toward better SEO and smarter crawl management. It can improve your site’s visibility, save crawl budget, and prevent indexing errors.
Where to Find robots.txt in WordPress
The robots.txt file in WordPress works a little differently compared to static websites. By default, WordPress automatically generates a virtual robots.txt file, which means you won’t see an actual file in your site’s root directory unless you create one manually.
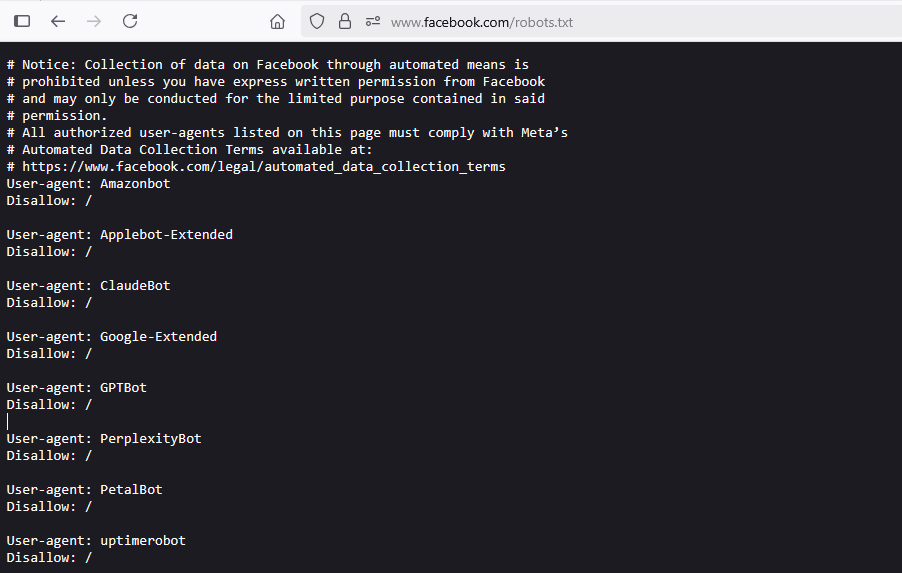
To check if your site already has a robots.txt file:
- Open your browser.
- Type your domain name followed by /robots.txt (e.g., www.example.com/robots.txt).
- Press Enter.
If a file loads, congratulations—you’ve found your robots.txt. Most WordPress sites will display a basic file that blocks access to the /wp-admin/ directory while allowing access to important files like admin-ajax.php.
Methods to Edit robots.txt in WordPress
There are three main methods to edit your robots.txt file in WordPress:
Method no 1: Editing robots.txt with Plugins (Yoast SEO, RankMath, AIOSEO)
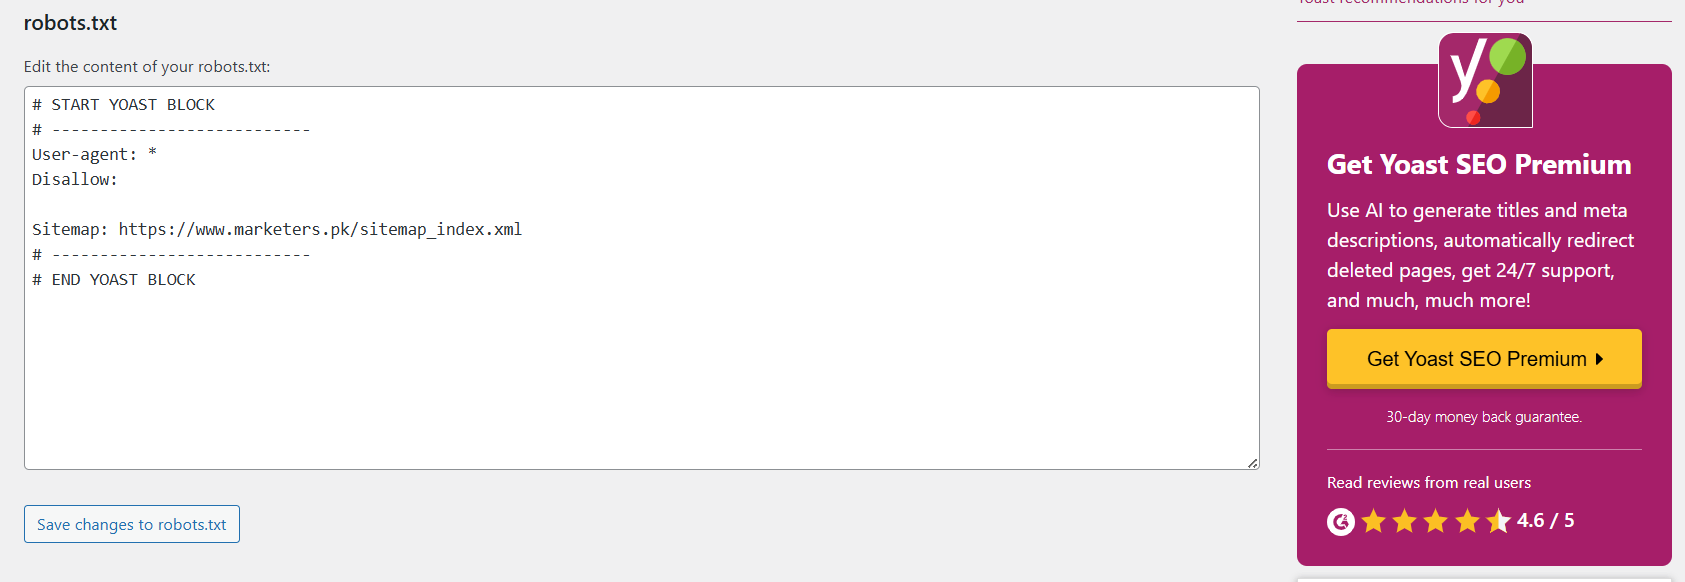
Steps to Edit robots.txt with Yoast SEO:
- Log in to your WordPress Dashboard.
- Go to SEO in the left-hand menu, then click on Tools.
- Click on the File Editor option under “SEO Tools”.
- You will see your robots.txt file. Yoast will prompt you to create one if it’s not created yet.
- Make the necessary edits:
- Example: Disallow: /wp-admin/ to block the admin section from being crawled.
- After editing, click Save Changes to apply the updates.
Method no 2: Editing robots.txt via WordPress Dashboard (If Plugin Allows)
Steps to Edit robots.txt via WordPress Dashboard (RankMath Example):
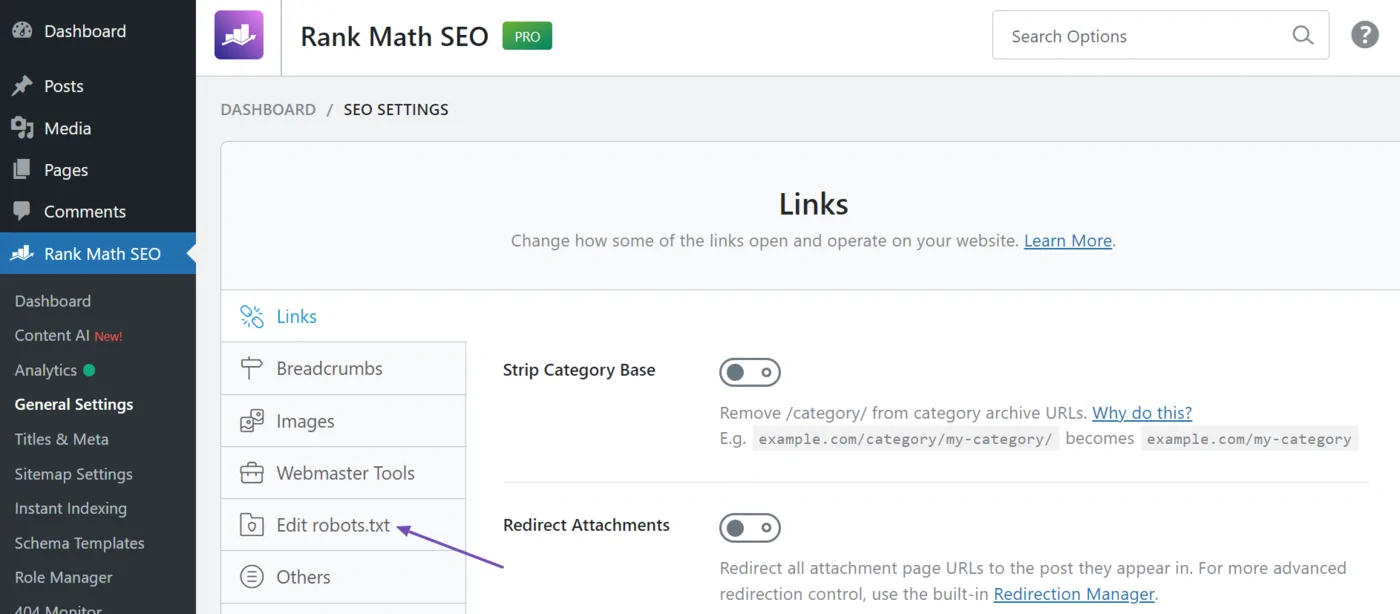
- Log in to your WordPress Dashboard.
- Navigate to RankMath in the left-hand menu and click General Settings.
- Scroll to the robots.txt section.
- Click on Edit robots.txt.
- Make your changes in the editor:
- Example: Disallow: /wp-content/ to prevent certain assets from being crawled.
- After making the changes, click Save Changes to apply them.
Method no 3: Manually editing robots.txt via FTP/cPanel
Steps to Edit robots.txt Manually via FTP/cPanel:
- Log in to your hosting account (via FTP or cPanel).
- If using cPanel, open File Manager; if using FTP, connect using your FTP client.
- Navigate to the public_html directory (or the root folder where WordPress is installed).
- Look for robots.txt in the folder.
- If it’s not present, create a new file and name it robots.txt.
- Open robots.txt in a text editor.
- Add or modify the rules you need. For example:
- Disallow: /wp-admin/ to block the WordPress admin area.
- Allow: /wp-admin/admin-ajax.php to allow specific admin files.
- Save and upload the file back to the root directory.
Best Practices for robots.txt in WordPress
Once you’ve learned how to edit your robots.txt file, it’s important to follow best practices to ensure that it benefits your site’s SEO without causing issues. Here are some of the most effective rules for your WordPress robots.txt file.
Recommended robots.txt Rules
- Allowing Essential Files
You should always allow bots to access important files like CSS, JavaScript, and images to ensure proper page rendering. Without these files, your site might not display correctly in search results.

- Disallowing Sensitive Areas
Block search engines from accessing areas of your site that shouldn’t be indexed, like your wp-admin directory. This prevents unnecessary crawl requests and avoids search engines from indexing admin pages.

- Preventing Duplicate Content
WordPress often creates duplicate content with URL parameters, for example, when you use filters or pagination. Use the Disallow directive to prevent search engines from crawling these duplicate content pages.

- Allowing Admin AJAX Requests
While blocking the /wp-admin/ section, it is essential to allow the admin-ajax.php file for many WordPress plugins to function properly.

Setting Crawl Rate and Crawl Delay
If you notice your site is over-crawled (which can negatively affect your site speed), you can set a crawl delay in the robots.txt file. This instructs search engines to wait a specific amount of time between requests. However, not all search engines support this directive.

Blocking Specific Bots
Add user-agent-specific rules to block specific bots from accessing your site. For example, to block Bingbot:

Directing Search Engines to Your Sitemap
Including a sitemap directive in your robots.txt file is helpful to ensure search engines know where to find your sitemap. This makes it easier for search engines to index all your pages.

Testing robots.txt Rules
After making changes to your robots.txt file, you should always test it to ensure everything works correctly.
- Google Search Console provides a robots.txt Tester to verify that your changes are functioning as expected.
- Example check: Ensure that important pages are not blocked by mistake, andd confirm that search engines are properly crawling your content.
Testing & Validating Your robots.txt
After editing your robots.txt file, testing and validating your changes is important to ensure that everything works as expected. Incorrect configurations can prevent search engines from crawling your website properly or may result in unwanted pages being indexed.
Using Google Search Console’s robots.txt Tester
Google Search Console offers a robots.txt Tester tool that allows you to check your file for any issues. Here’s how to use it:
Steps to Test robots.txt in Google Search Console:
- Log in to Google Search Console.
- In the left sidebar, click “Crawl” and select “robots.txt Tester”.
- The robots.txt Tester will automatically display the content of your robots.txt file.
- Enter the URL of any page on your site that you want to test.
- Google will show whether the page is blocked or allowed according to your robots.txt rules.c
- If you find any issues, modify your robots.txt file accordingly.
What to Look For:
- Blocked pages: Ensure that important pages are not accidentally blocked by robots.txt.
- Unblocked pages: Confirm that search engines can crawl and index critical pages on your site.
Using “Fetch as Google” to Check Crawl Behaviour
Once your robots.txt file is live and tested, you can use the “Fetch as Google” feature to see how Googlebot views your site. This is another way to ensure that Google is able to access your content correctly.
Steps to Use “Fetch as Google”:
- Go to Google Search Console.
- Click on “URL Inspection” in the left-hand menu.
- Enter the URL of a page you want to test.
- Click “Test Live URL”.
- Google will show whether the page can be crawled and indexed properly.
- If there are issues (e.g., blocked by robots.txt), it will display an error.
Using External Tools to Validate Your robots.txt
In addition to Google Search Console, you can use external tools to validate your robots.txt file, including:
- Bing Webmaster Tools: Bing also offers a robots.txt tester.
- SEO tools like Screaming Frog crawl your site and can help identify issues related to robots.txt blocking.
Best Practices for Ongoing Validation
After initial testing, it’s important to check your robots.txt file as your website evolves regularly:
- Monitor site performance in Google Search Console.
- Revisit robots.txt when you make major site changes (e.g., adding new pages or restructuring the site).
- Test after every update to ensure that search engines can still crawl and index your important pages.
Conclusion
Editing your robots.txt file in WordPress is essential in controlling how search engines crawl and index your site. By following best practices, testing your changes, and avoiding common mistakes, you can enhance your site’s SEO, prevent duplicate content issues, and ensure that search engines are crawling the most important pages. Whether you choose to edit via plugins, the WordPress dashboard, or manually through FTP, the right configuration can significantly improve how your site performs in search results. Make sure to revisit your robots.txt file regularly to optimise your site for search engines and users.